NAS TV Sat Pac
$1,082.90 – $1,138.90

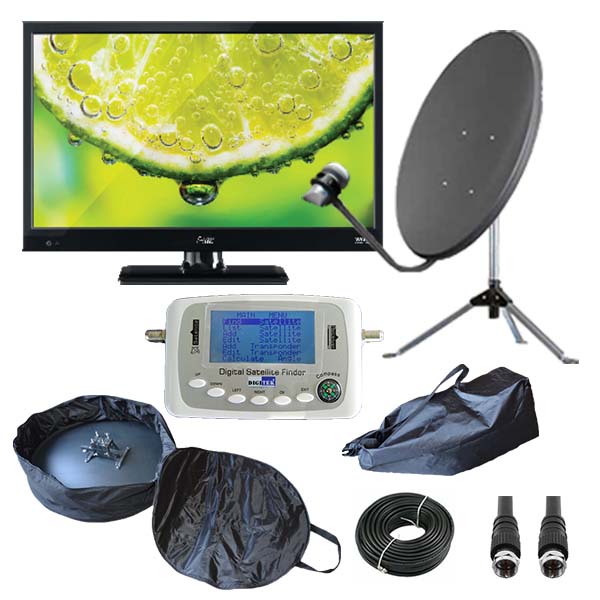
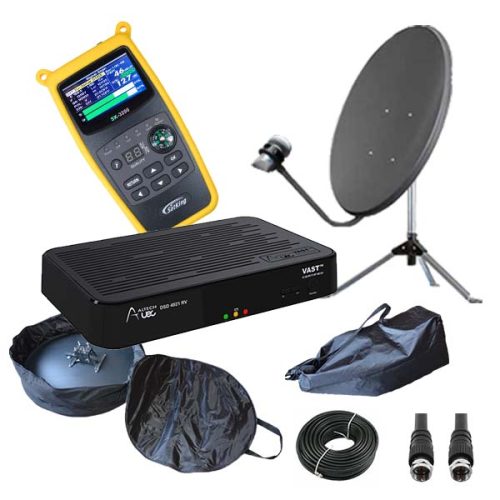
The TV package contains everything you need to set up and receive satellite TV quickly and easily.
TV SAT PACK CONTENTS
* Altech UEC VAST 22″ TV with built-in receiver
* 80cm or 83cm Satellite Dish
* SignalMAX Ground Mount Tripod
* LNB Single Receiver (up-gradable item)
* 80cm or 83cm Satellite Dish Arm
* Digitek Digital Satellite Finder
* RG6 15m Coaxial Cable
* RG6 1.8m FlyleadBlack
* Carry Bag for Dish
* Carry Bag for Tripod
UPRGRADE OPTIONS
* Altech Dual Channel VAST Receiver &
* LNB Dual Receiver
Be sure to select the correct size dish you wish for you kit, ie, either 80cm or 83cm. This is included at no extra cost.
If you wish to upgrade to Dual LNB, you will need to add this as an upgrade and extra costs will be incurred.
Shipping Costs (applied at checkout)
QLD, SE-$1
NSW-$1
VIC-$1
QLD, FNQ-$34
SA-$16
TAS-$16
WA-$77
NT-$91

12 Month Warranty
Quality & Manufacturer Defects

Delivery: Next Day Despatch
See pricing above

Read Our Full Review
Click here to read our full product review below

View Other Products in the Range
TV Sat Pac | Complete Sat Pac | PVR Set Top Box | Set Top Box
$1,082.90 – $1,138.90

NOTE TO READERS: Please note that since preparing this original article. Some of the items mentioned in the article have changed. In particular, the Receiver mentioned has now been upgraded for a newer, more technologically advanced model. Which means it is much better with more functions, but for the same price. NAS Have also upgraded the Satellite Finder. Therefore there may still be some references in the videos that will show the older equipment. However, rest assured the functionality is still the same of demonstration purposed, but the new equipment will just work better.
Granted, not all caravanners want or need a TV, but for those on the road full time, the caravan or motorhome should feel like a real home. It doesn’t matter if you are getting away for a weekend, or a short break, it can still be a perfect time to unwind and watch a favourite sporting event or a TV show.
Finding the right Satellite TV system for you
So, what is the best way to get TV on the road, and what options do you have?
Late last year, we discussed this with two of our FRC ambassadors, Keith & Frances who are on the road full time. And, as we do at Free Range Camping, we decided to research all options and see what was available out there.
We started off by reading all we could about what others have to say, and in the end, our research led us to the NAS system which we have been using since the beginning of the year. We got Keith all the components he needed, and he has been testing it in a variety of locations since then.
Below, Keith takes us through the whole Satellite system, including what is required, how to set it all up and the results.
If you are seriously contemplating getting a Satellite system for your caravan or motorhome, this article is well worth a read.
A word from Keith
Living on the road full time, we are often in places where TV reception is hard to come by, and whilst we love the new experiences we have each day, it is still nice to have a TV to keep up to date with news and events, and also watch our favourite TV Shows.
We had been contemplating a Satellite system for our van since we started our trip, but persisted with standard TV reception for the first few years. I am not really sure if we did get satellite which was the best way to go, but when Rob asked us to research it further we did, and I am happy to say we are pleased with the results.
In the course of my research I have made a few short videos and detailed my findings.
Keith – A happy camper with his new Sat TV
What components are required?
In our view, there are basically three major components to setting up a good, easy to use, satellite system, apart from a TV and accessory cables that is.
1. The Receiver – the device that receives the digital signal so you can watch the broadcast on your TV.
2. The Dish – Including the Tripod and LBN (low-noise block down converter) the receiving device mounted on the satellite dish that collects the radio waves from the dish.
3. The finder – which is a signal meter that is used to help you accurately point satellite dishes to communications satellites.
You can watch the video to get an overview of all the components.
Components in detail
THE RECEIVER
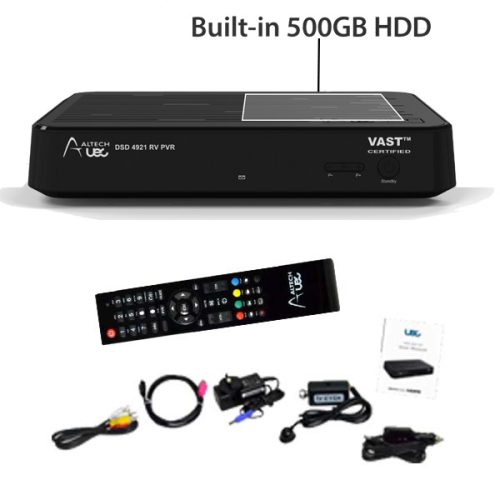
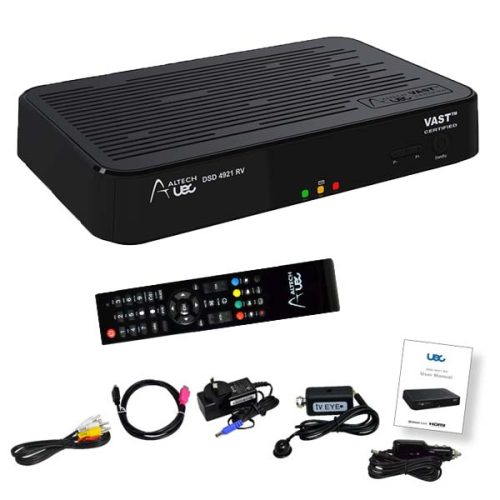
The core of any Satellite TV System is, of course, the Receiver (or Decoder as some refer to it). We used the Altech (UEC DSD4121RV) PVR ready version in the videos below. The Altech Receivers are designed specifically for the Optus Satellite Platform and not derived from another overseas market models. These receivers are also designed from the beginning to operate from 12 volts for the RV environment and when used on 240v mains supply utilise an external power supply (included in the box).
We recommend the PVR (Personal Video Recorder) ready version which uses the USB port to connect to a USB stick (up to 128Mb) or an external hard drive for recording when you are unable to watch TV live. It also serves as a port to play back other compatible recorded material if your TV doesn’t have this function.
Please note: The DSD 4121 RV model has just been replaced with the DSD 4921 RV Model with many more features. To find out more about the current model click on the link here: The New DSD 4921 RV
See the video below to find out more about the Receiver & Satellite Finder
The NEW Altech (UEC DSD4921RV) Satellite Digital Receiver
THE DISH & COMPONENTS
DISH
NAS supply us with a choice of two dishes, either an 80cm or 83cm dish, we chose the 83cm dish, as it is one of the largest dishes available and guarantees maximum signal anywhere in Australia. The 80cm dish has cut off top and bottom to reduce storage size when travelling. The manufacturing of these dishes is perfected by using high quality steel with a rolled edge to prevent distortion and finished with a polyester powder coating. To keep the shipping bulk down, the dish is supplied as a kit with very simple assembly of the mounting bracket required, this is shown in the video below and only has to be done once.
80cm & 83cm Satellite dishes
Included in the dish kit is the arm, which extends to the front of the dish and holds the LNB in place.
To see how the dish is assembled and set up, see the video below
Setting up your Satellite Dish
THE LBN
This is the small grey unit which attaches to the end of the arm and receives and converts the radio waves from the dish. We have opted for the single model, which allows for only one signal, however there is also the dual model available which allows for Foxtel to be received as well.
Single model LBN
THE TRIPOD
The tripod supplied is one of the best on the market with heavy duty construction and a very simple method of levelling before aligning the dish to the satellite. It also has a way of allowing rotation without using the u-bolt clamps. These features are best seen in our setup video.
Tripod with built in bulls-eye level
THE SATELLITE FINDER
To set up Satellite TV quickly and efficiently the easiest way is to use a Satellite finder. Whilst there are many methods available, including using two people to rotate the dish and search, we found the supplied pre-programmed finder simple and easy to use, making set up a breeze. Whilst smartphone apps can assist you with finding the general directions of where to point your dish, they will not actually measure signal strength and quality. A satellite finder actually plugs inline and measures the strength and quality of your signal. Cheaper alternative signal only meters are available, but often give false reading on strength and do not always measure the quality of the signal.
NOTE: Our original videos show the Digiteck Satellite Finder being used. We have now replaced this model with the SatKing SK 3200 Satellite Finder which is a much more advanced model.
The NEW SK 3200 Satellite Finder – Guaranteed to find strong quality signals quickly & easily
OTHER COMPONENTS
CABLES & CONNECTIONS
To connect everything together, there is a generous 15 meters of co-axial cable included for dish to van and a 1.5 meter fly lead for the tuning process. All cables are of the highest quality RG6 Quad Shield type with professionally fitted connectors. These cables are made up in house by our supplier and are not cheap Asian imports.
CARRY BAGS
To protect your gear whilst travelling there are two high quality padded carry bags available, with the dish bag also able to store the finder, cables and dish arm.
Carry Bags for Tripod, Dish & Accessories
TV
If you are in need of a TV with your system or thinking of upgrading, the Altech VAST 22” 12 volt LED/LCD TV is the ideal companion for your system. The TV includes the receiver and tuner, saving on cost and space.
UEC 22” 12 volt TV with built in receiver
Setting Up a Satellite TV System
Setting up your system and finding a signal is easy, providing that you follow 3 basic alignment procedures, these are outlined in more detail in the attached videos.
Dish Elevation
When setting up your dish, remember that the degree of elevation (angle to the satellite from horizontal) also varies. This is because the satellite is located above Papua New Guinea and the closer to PNG, the higher the elevation angle. This angle can vary from 30 degrees in Western Australia to 70 degrees in Northern Queensland. View below chart for elevation.
Dish with single LNB and LNB Arm
Elevation Map
The above map also provides a quick reference to the elevation angle required for the Optus C1 satellite. The numbers above refer to the angle in degrees that your dish must be set to. Remember to always set your dish to around 5 degrees lower than the specified elevation angle and work your way up in 1 degree increments as you pan from left to right.
The tripod supplied with this unit, also comes with a built in levelling device, which makes it easy to find correct levels. More about this in the video.
Tripod with inbuilt level
Skew
The LNB needs to be rotated. This is called LNB SKEW. Skew angle changes depending on your location. You have to travel a considerable distance for the LNB SKEW to change.
Below is showing the LNB rotated clockwise around +20 degrees (straight down would be 0 degrees). There are some areas of Australia that have a negative skew. This would mean the LNB should be rotated anti clockwise.
Skew
Digital Satellite Finder
The satellite finder connects between the dish and receiver and takes its power from the receiver via the co-axial cable. If you have a need to tune the dish without being connected to the receiver there are AC (Plug Pack) and DC (Battery Box) power options supplied; a cable joiner is also included to eliminate having to swap cables after aligning. If you have no other means of finding the settings for your location this unit includes a calculator for all three required adjustments (Azimuth, Elevation, and Skew).
NOTE: Our original videos show the Digiteck Satellite Finder being used. We have now replaced this model with the SatKing SK 3200 Satellite Finder which is a much more advanced model.
Satking SK 3200 Digital Satellite Finder
Below is a video which shows the Receiver & Satellite finder in more detail.
TIPS ON SET UP
The Optus C1 satellite is located at 156 degrees East. This doesn’t mean that you point your dish towards 156E on a compass! It means that the satellite is located 156 degrees East of 0 longitude. For example, I am located in Melbourne at 145 degrees longitude so if I look North (true North) the satellite is 11 degrees to the East of me (156-145=11). Knowing this info helps you locate the direction to the satellite but don’t take it too seriously. As long as you know roughly where North is, then you can find a spot for your mount easily. Remember that the Optus C1 satellite is always East or true North and obviously the number of degrees East will vary depending on your location. Make sure that you locate your dish in a position that permits light of sight to the satellite with no obstruction such as trees or buildings.
What we thought
After setting up the system and trying it out for a while, Keith was very impressed with the whole kit. Here are his thoughts on it.
The whole package was easy to set up both the first time and thereafter and the quality of everything supplied is excellent. Compared with normal digital TV reception in country areas, the reception is much clearer and more stable; there is also no more interference from internal or nearby electronics which many of us have come across since digital TV became “the norm”. We have not had Sat TV before and it was easy to become familiar with how the whole system works and to set up the dish each time; The dish arrives as a kit to makes it easier to transport for delivery to the customers and was very easy to assemble, a once only requirement. Everything went together easily and I was very impressed with the tripod supplied for easy levelling especially. One of our videos specifically deals with setup and alignment of the dish and will help the first timers among you (we hope!).
Happy watching from the road, Keith and Frances Thompson
Added benefits of NAS Satellite Kits
NAS:
We have chosen NAS as our supplier of these great Satellite kits. They are locally based in Brisbane, are family owned and operated and originally established in 1982 giving them three decades of industry experience and making them qualified experts in the TV reception industry.
NATIONWIDE DELIVERY:
No matter where you are travelling in OZ, we can ensure that we will be able to get a satellite kit delivered to you, with deliveries extending all over Australia.
WARRANTY:
NAS are offering a full 2 Year warranty period on all their products.
SUPPORT:
NAS have got all states covered with service agents all around the country, so you will never left pondering on what to do if you have a problem.
Download a list of current service agents
As well as this phone support is available Mon-Fri from 8.30am – 4.30pm or for other advice or information you can email them direct at [email protected] They also have extensive support via their web site.


Reviews
There are no reviews yet.